Introduction:
French doors can be a stunning addition to any home and bring a touch of elegance to your living space. In this tutorial, we will guide you through the process of building your own French doors. From measuring the existing door opening to sanding and painting the finished product, this comprehensive guide ensures your success in creating beautiful French doors. One thing to note: there are many methods to building anything – this is what worked for us. Feel free to adjust your build and method any way you see fit!

Materials:
- Wood (Suitable for your desired door size – we used 8/4 Sapele)
- Glass Panels (We used 1/2″ tempered glass)
- Measuring Tape
- Table Saw
- Jointer/Planer
- Miter Saw or Miter Box
- Bandsaw
- Festool Domino + Floating Tenons
- Router
- Roman Ogee Router Bit
- Rabbeting Router Bit
- Chisel
- Bondo or Wood Putty
- Glass Adhesive
- Clear Glass Caulking
- Sandpaper
- Primer & Paint
- Safety Goggles
- Dust Mask
Step 1: Measure the Existing Doors and Opening
Using a measuring tape, determine the width and height of the existing door opening. Remember to measure both the width and height at multiple points to ensure accuracy. Make sure to account for any necessary clearance at the top and sides of the doors. If there are existing doors that you are replacing, it is helpful to measure the size of the existing doors.
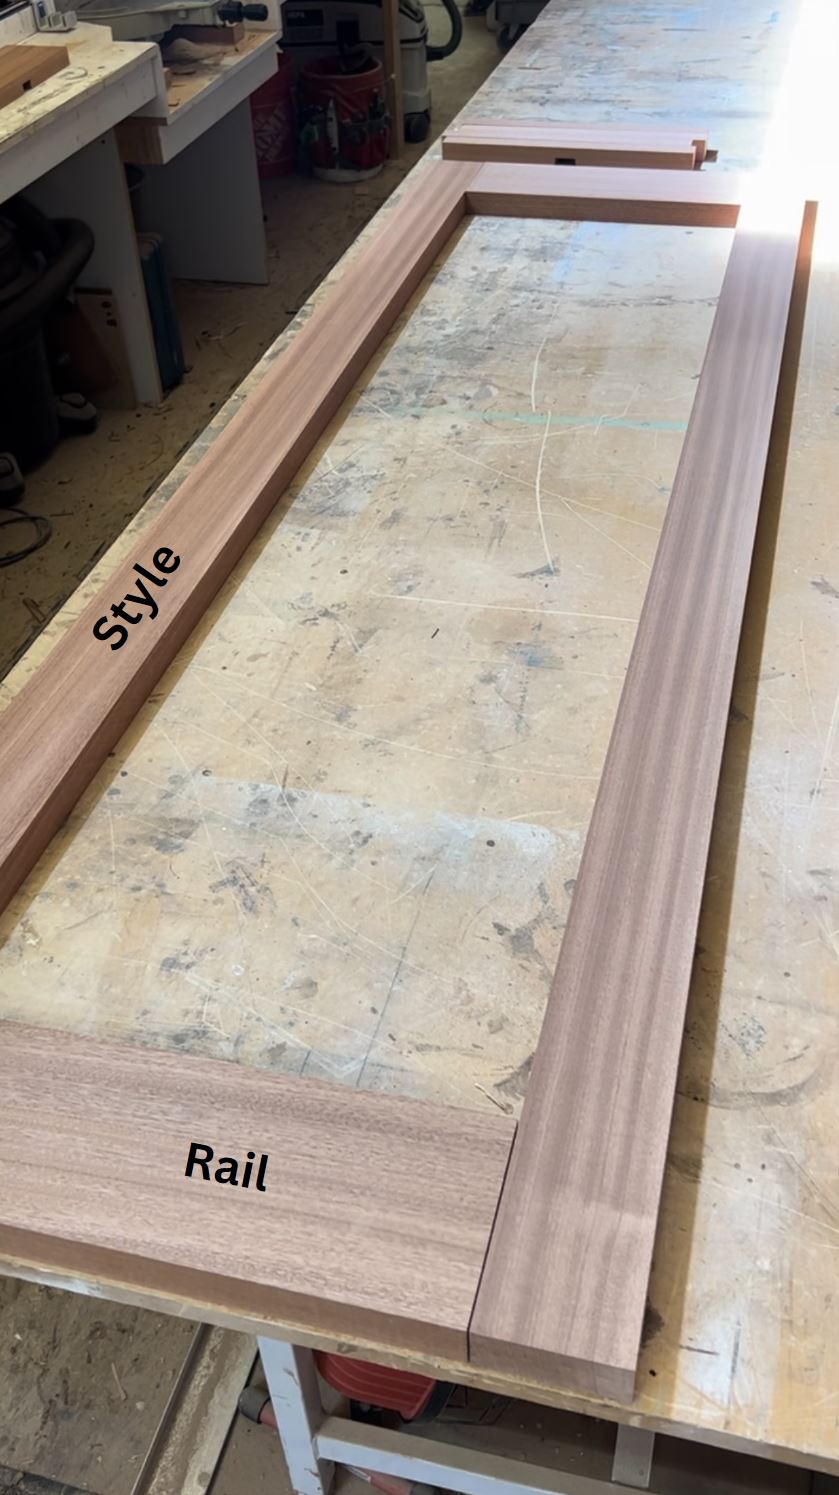
Step 2: Mill the Wood to the Appropriate Size
Most 8/4 wood is dimensionally thicker than what you need it to be. Standard exterior doors have a thickness of about 1.75″. To mill your wood to the appropriate thickness, use a jointer to get a flat reference, then use a thickness planer to mill it down to the desired thickness. Then, using a table saw or circular saw, cut the wood to the desired dimensions, starting with the vertical styles, then the horizontal rails. Also cut your mullions to form the grid pattern. If you are using traditional mortise and tenon joinery rather than Festool Floating Dominos, ensure that you cut your material longer than needed to account for the tenons.
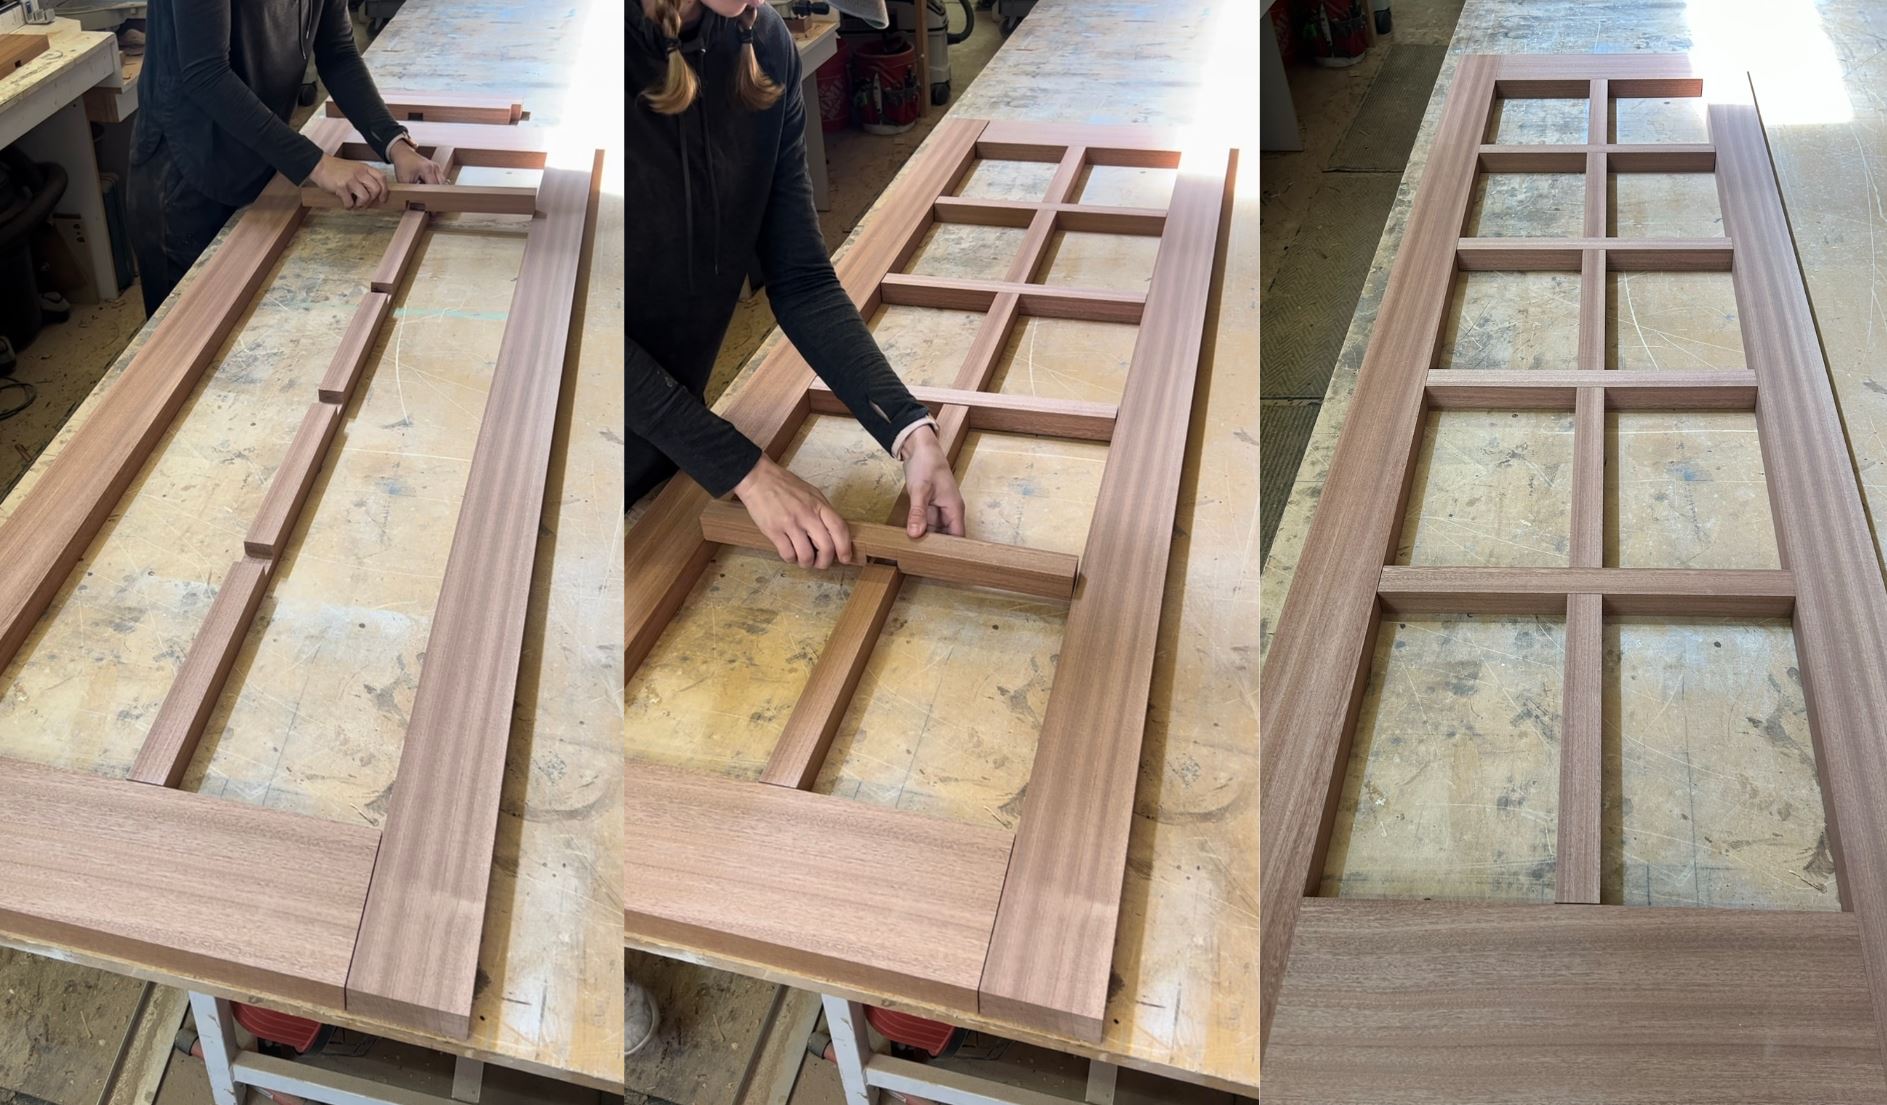
Step 3: Join the Mullions Using Half-Lap Joinery
To create a grid pattern, cut notches (half lap joints) in the wood pieces that will form the grid. Precisely measure and mark these cuts, ensuring they are evenly spaced and aligned. Utilize a table saw or chisel to create the notches. Dry fit the pieces together and make any necessary adjustments.
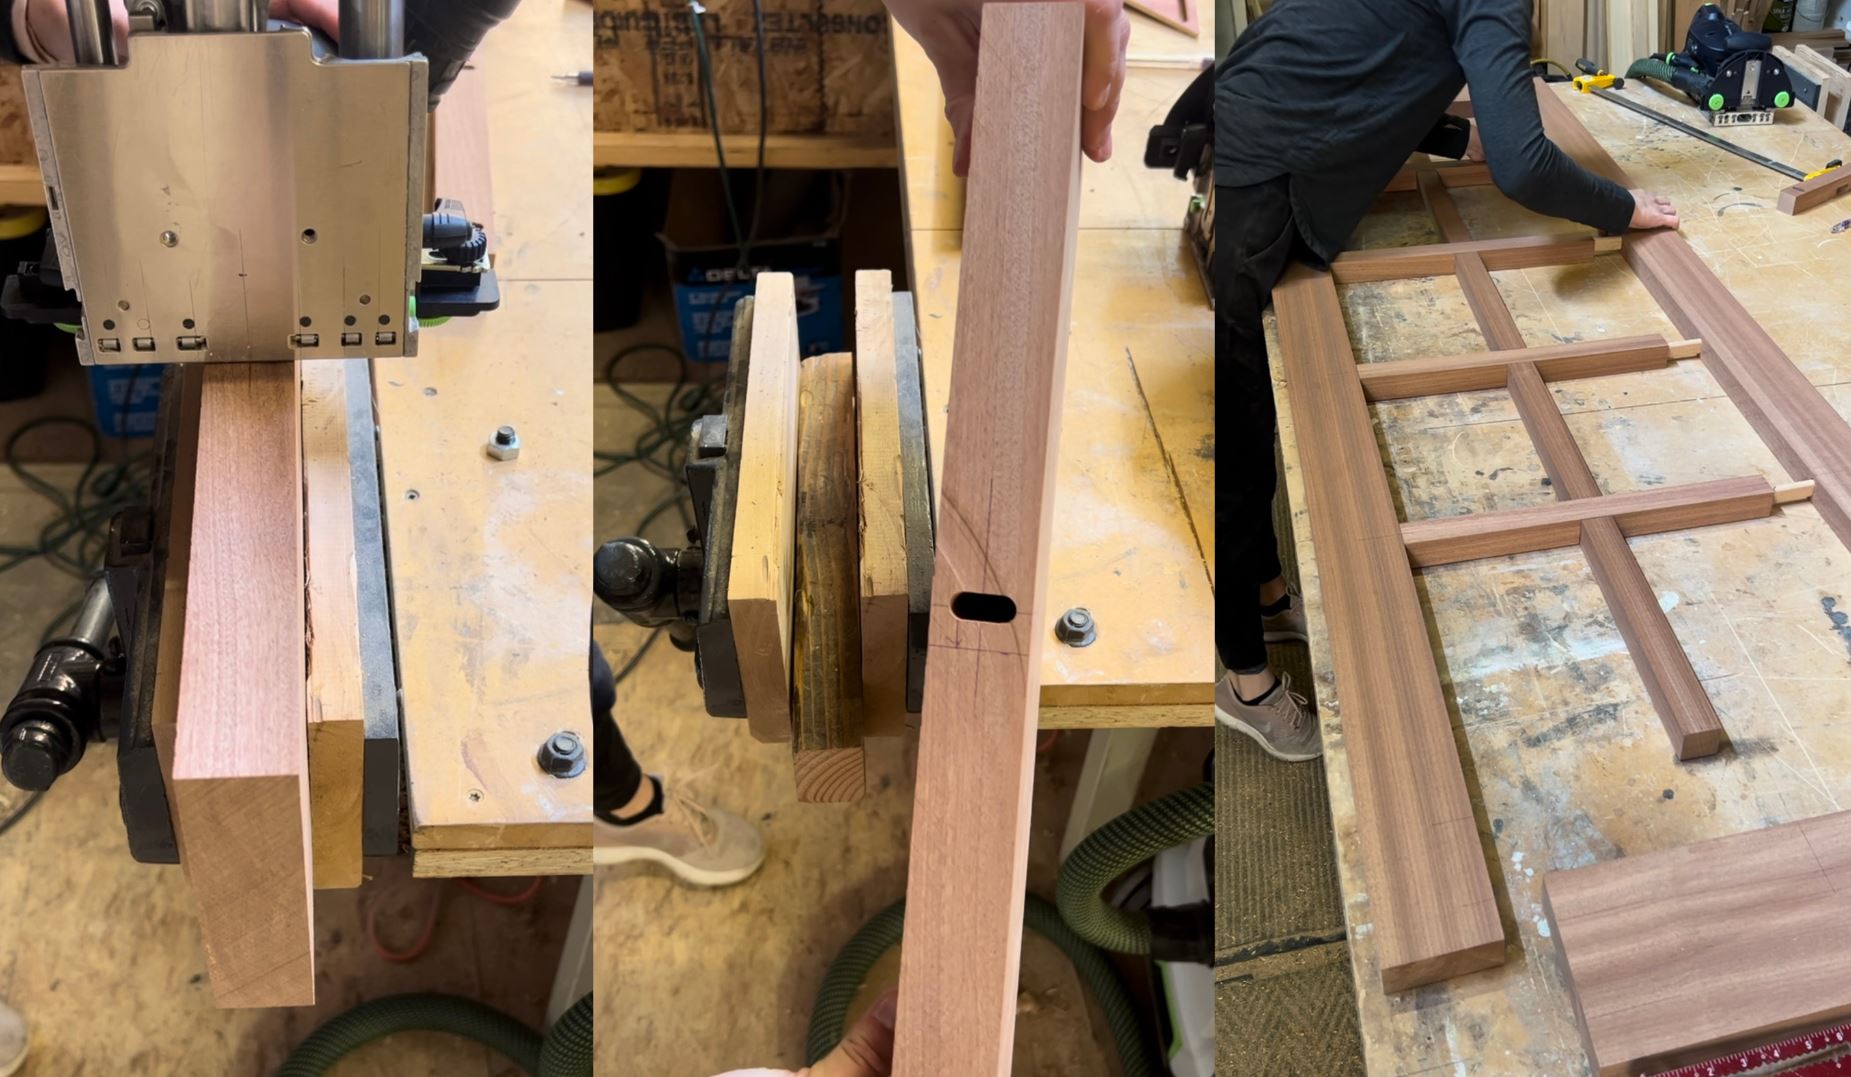
Step 4: Assemble the Pieces using Festool Domino Floating Tenons
To securely join the wood pieces together, use Festool Domino floating tenons. You could also use traditional mortise and tenon joinery techniques. Measure and mark the locations where the tenons will be inserted. We used our Festool Domino DF 700 machine and 14mmx140mm dominos to create the necessary holes. Insert the floating tenons into the corresponding holes and assemble the pieces, ensuring they are aligned properly. Use wood glue and clamp the joints in place until the glue dries.
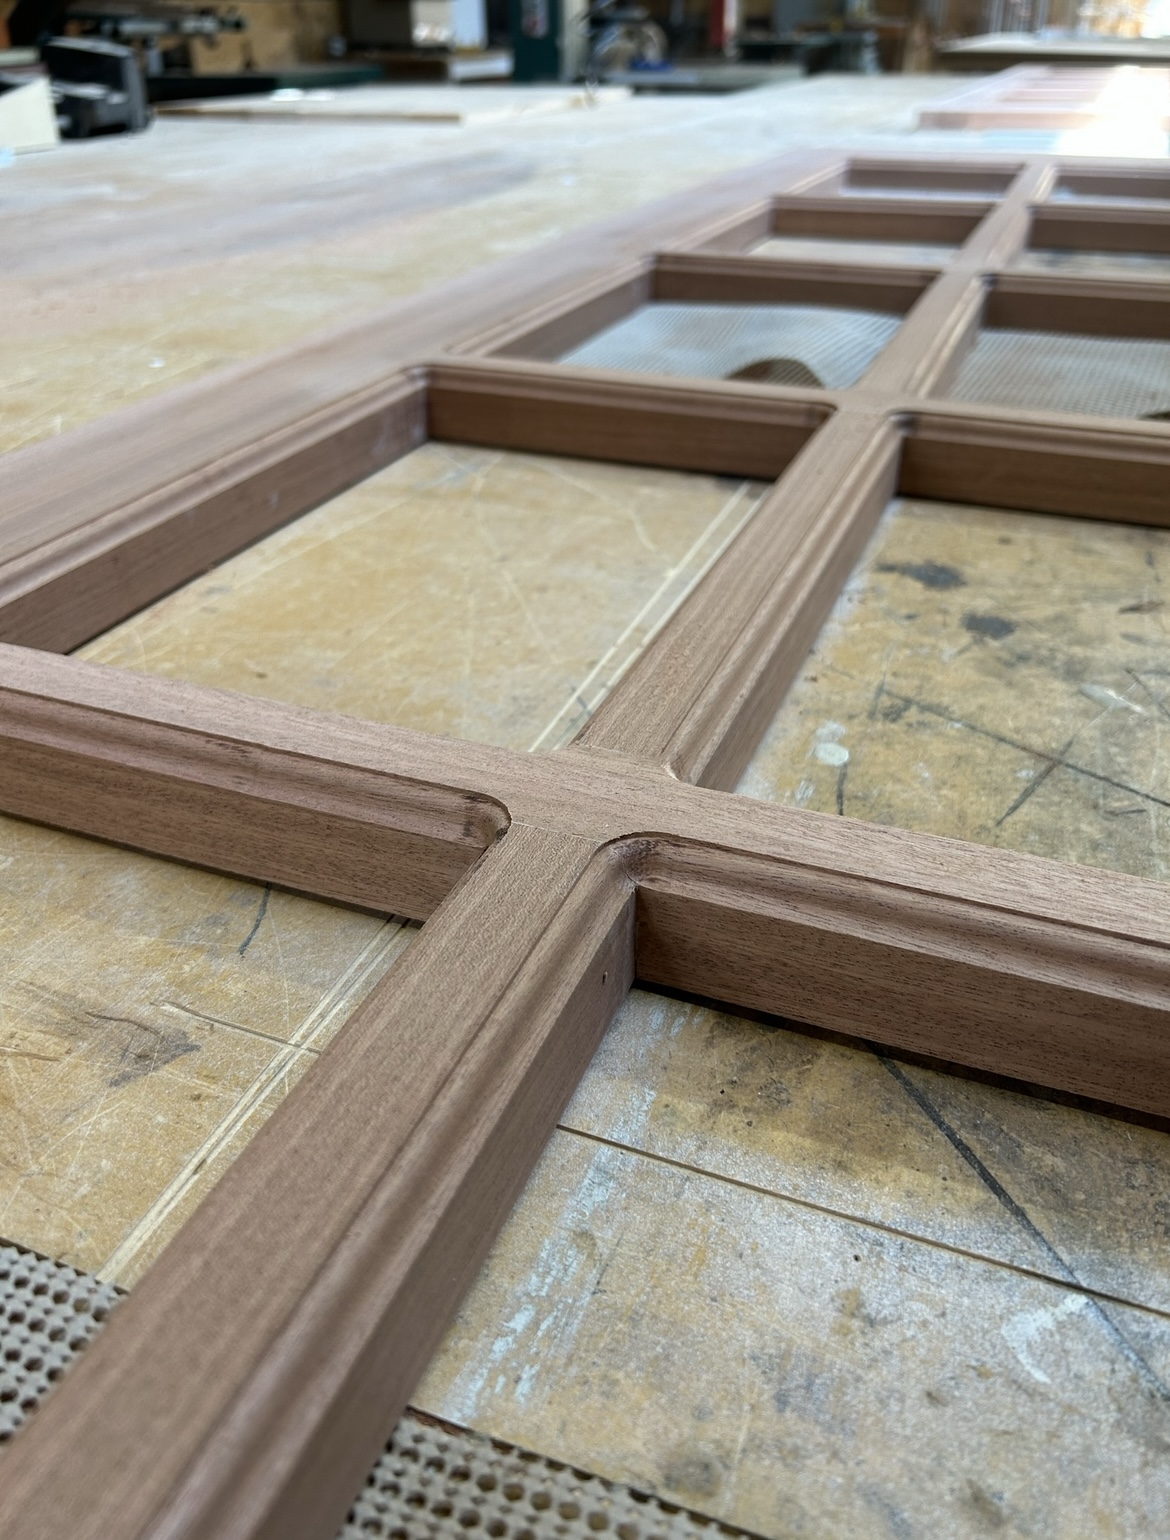
Step 5: Use a Trim Router to Create the Decorative Grid on Exterior Side
After the glue has completely dried, unclamp your piece. Use sandpaper to sand down any uneven surfaces or dried glue. On one side of the door – we did it on the exterior side of the door, use a trim router with a Roman Ogee bit (or your preferred decorative trim bit) and route around each square grid until all interior edges have the trim pattern.
Step 6: Route the Interior Side to Accommodate the Glass
Measure and mark the desired location for the glass panels on the other side of the door. Utilizing a router with a rabbeting bit, carefully route out a groove to accommodate the glass. Take proper safety precautions, such as wearing goggles and a dust mask, and ensure smooth and precise routing. Use a chisel to square off the corner. Test fit your glass to ensure a proper fit – the glass should have approximately an extra 1/8″ on each side, as you do not want the glass too tight. If the wood expands and contracts, it could break the glass if the fit is too tight.
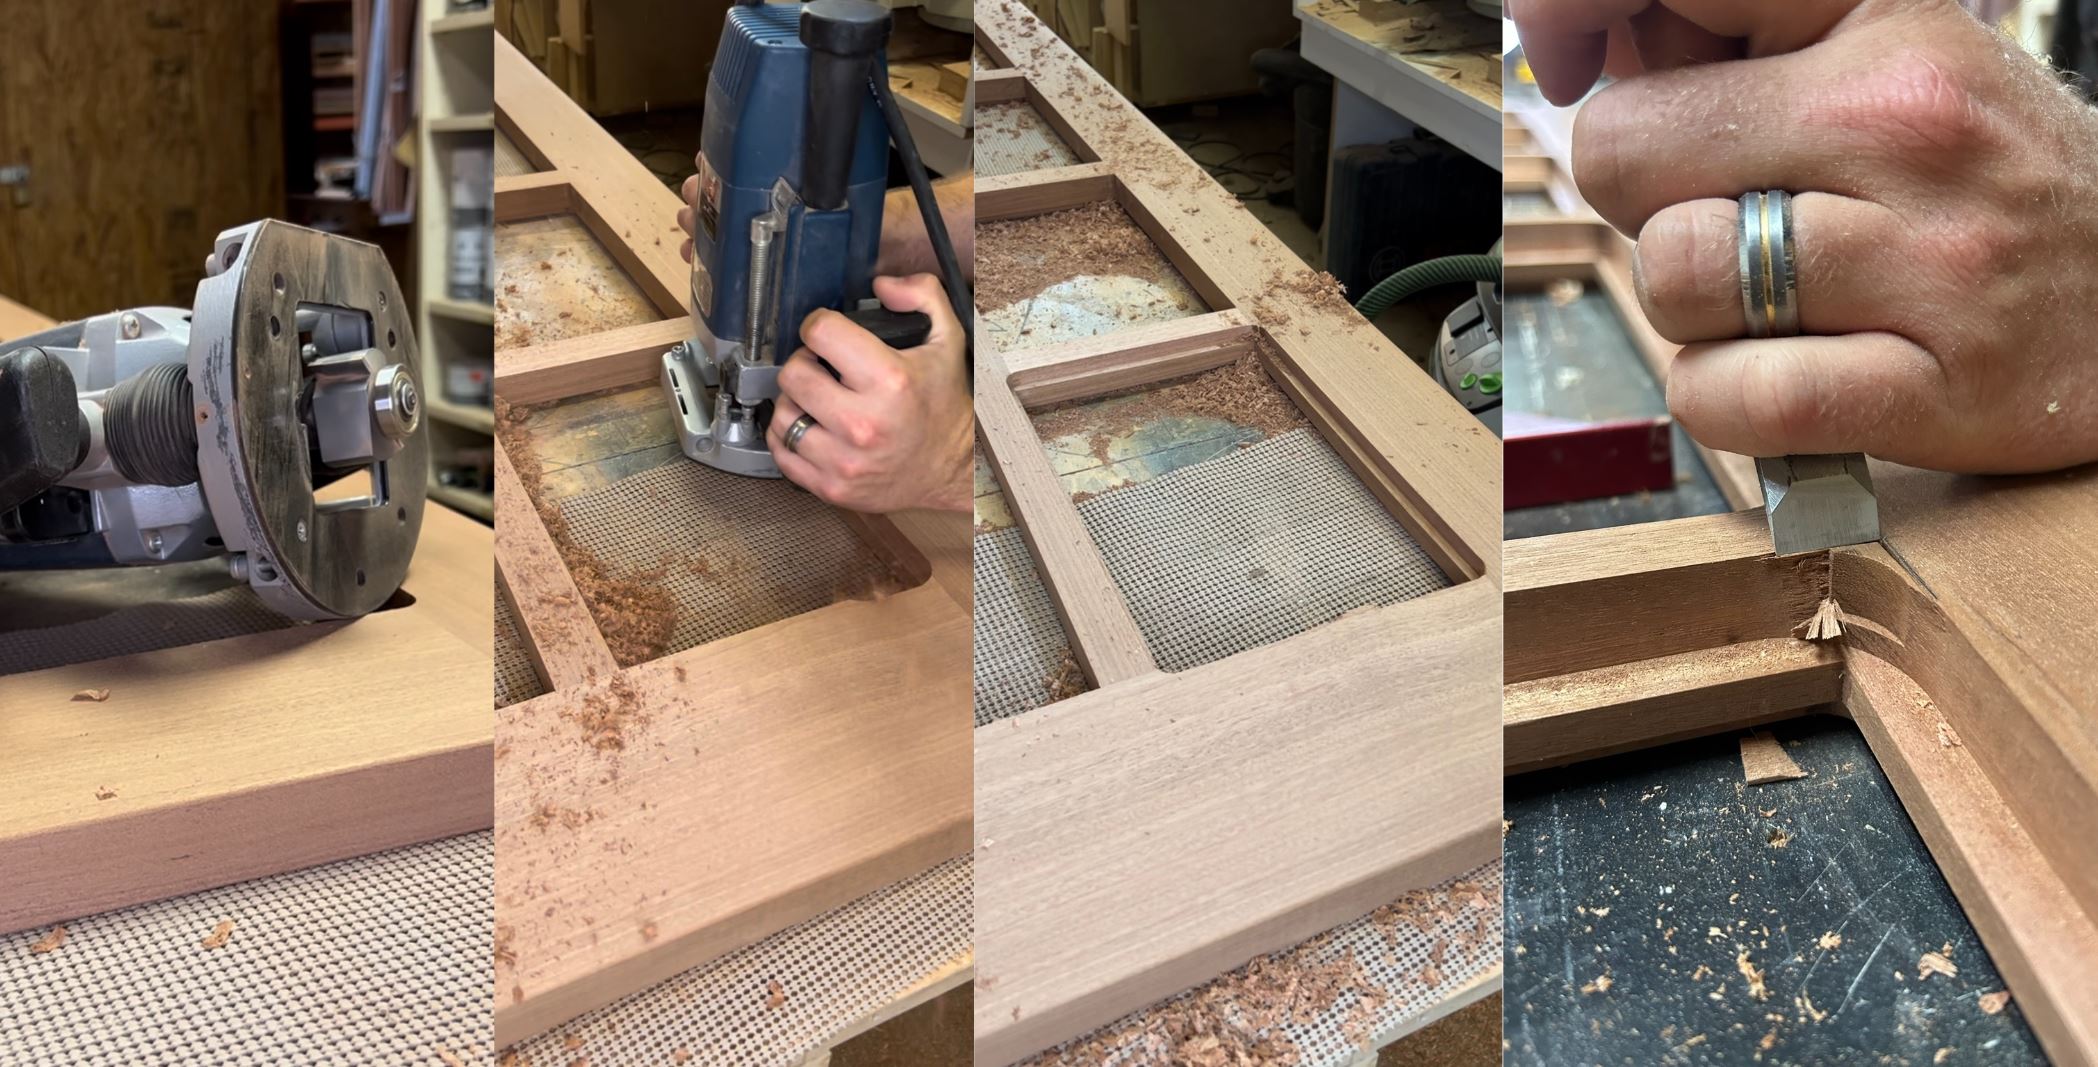
Step 7: Make the Decorative Mullions for the Interior Side
Because this side of the door does not have the decorative mullions, we now have to build our own. Use the same Roman Ogee or other decorative router bit on scrap pieces of the same wood species you built your door with. Then, cut your trim pieces to the appropriate size to fit inside your grid. We used a bandsaw to cut the small decorative pieces, then used a miter box to create a 45 degree angle. Test fit your mullions with the glass inserted to make sure all trim pieces fit properly.

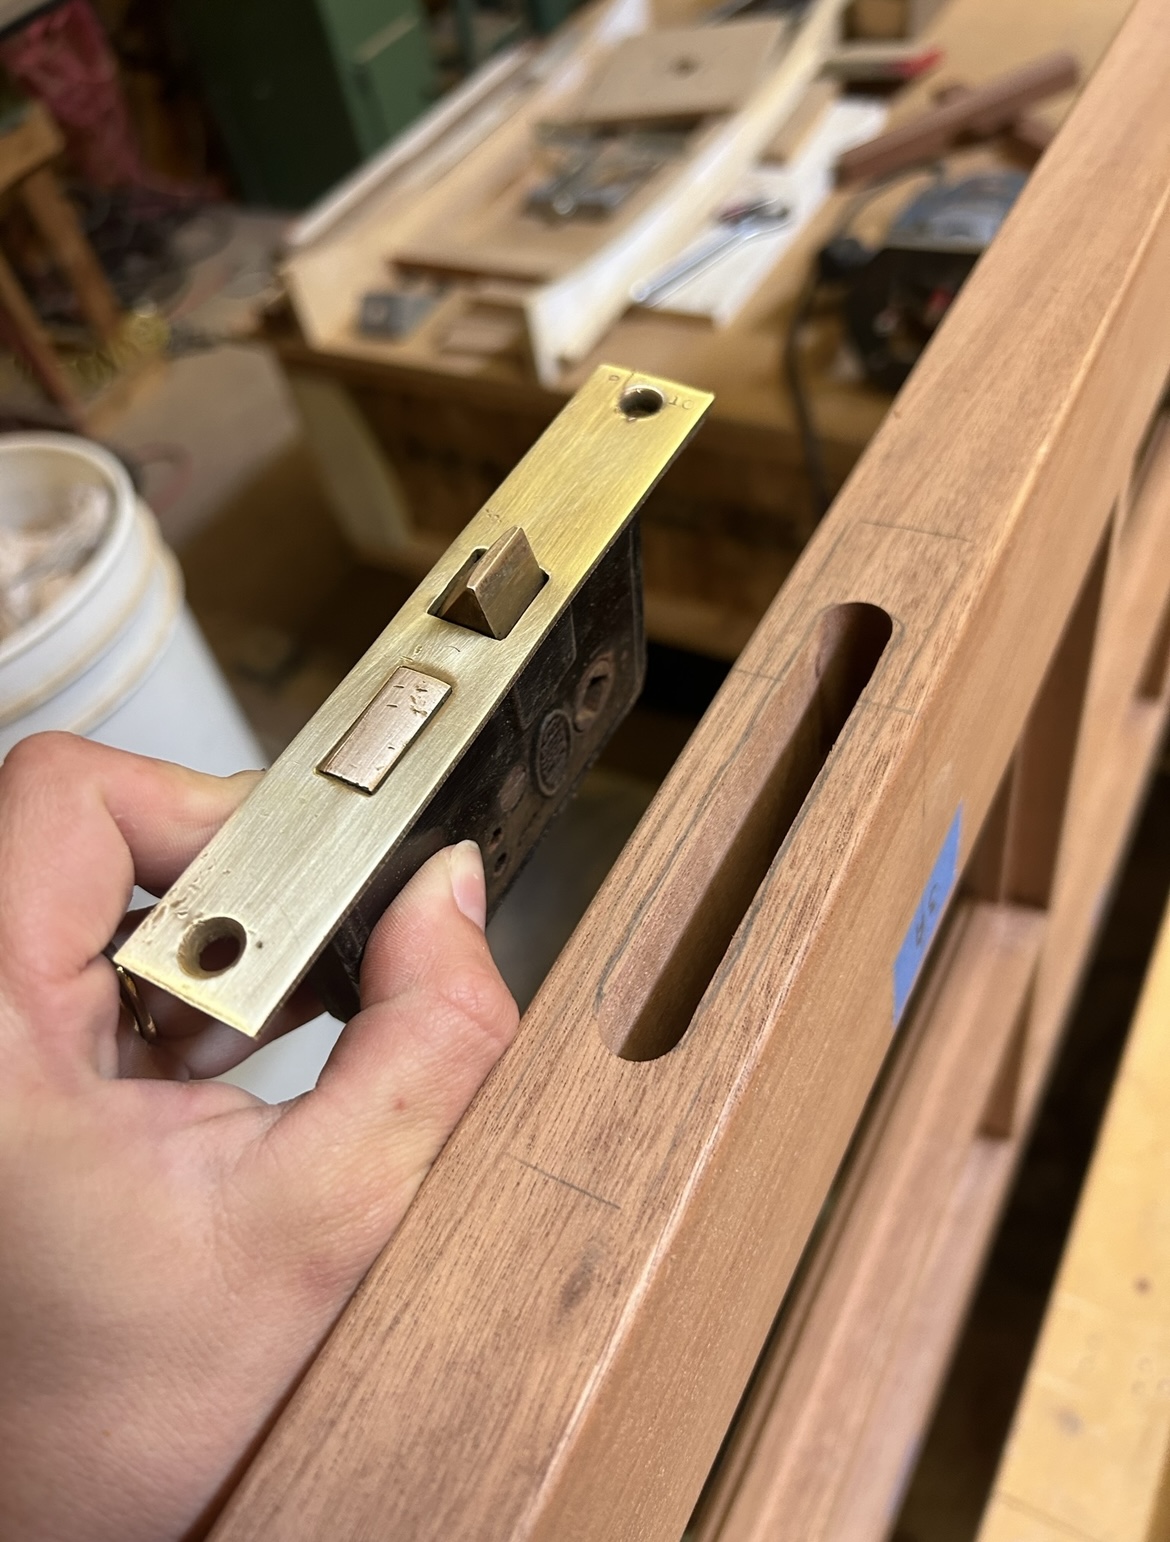
Step 8: Prepare the Door Hardware
We like to prep the doors for their hardware before we insert the glass. The less handling we have to do without glass nearby, the better. For these particular doors, we reused the antique hardware from the doors we were replacing. The prep work for your hardware will likely differ from ours, so consult your hardware instruction manual for installation instructions. Drill the appropriate cutouts for your hardware, but keep the hardware itself off the piece while you sand, prime and paint.
Step 9: Sand the Doors
Inspect the doors for any holes or imperfections. If necessary, use Bondo or wood putty to fill in any gaps or holes. Start with a coarse-grit sandpaper and work your way up to a finer-grit for a smooth finish. Ensure the doors are free from any rough patches, imperfections, or sharp edges. Pay extra attention to the joints, corners, and edges to achieve a professional look. We always start with 80 grit sandpaper, then move up to 120 grit, and finish it off with 220 grit. Be careful around your decorative mullions as to not sand off too much and damage your decorative route. Carefully hand sand the mullion pieces with a foam pad or sanding block.
Step 10: Prime and Paint the Doors and Mullions
Before installing the glass and interior decorative mullion pieces, we primed and painted our doors so that we wouldn’t have to tape off the glass. Using paint and primer suitable for your desired finish, paint the doors and decorative mullion pieces according to your preference. Apply multiple thin coats, allowing each coat to dry completely before applying the next. Follow the manufacturer’s instructions for application and drying times.

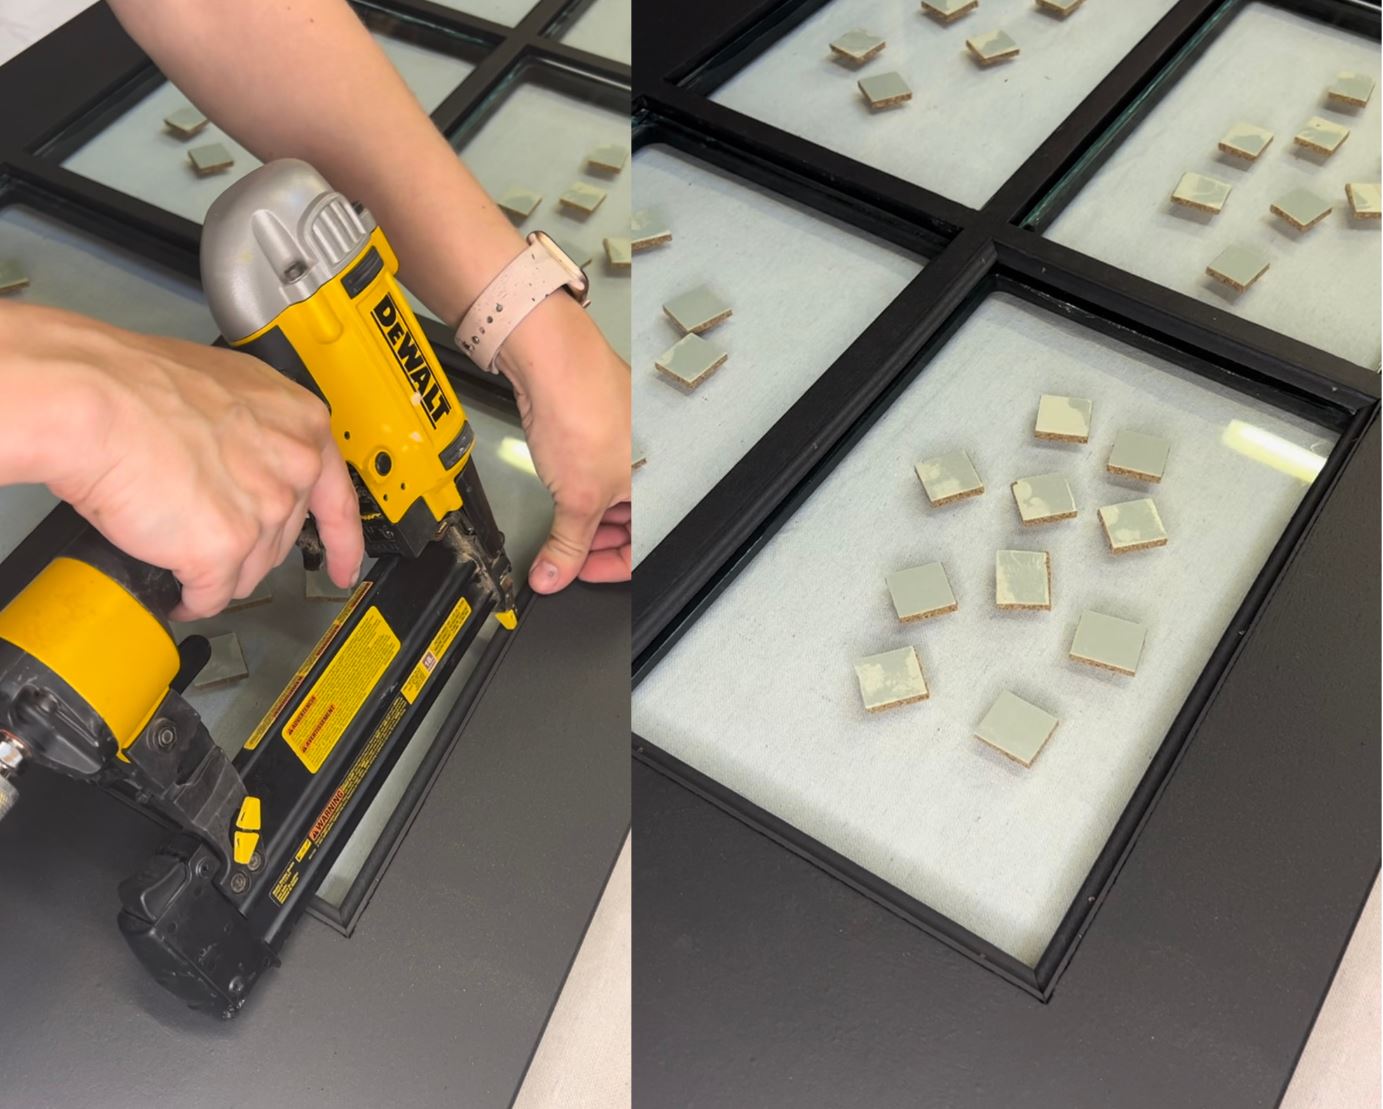
Step 11: Install the Glass and Decorative Mullion Pieces
In each grid square, use a dab of glass adhesive in the corners and insert the glass into the routed space. Add your decorative mullion pieces, and secure them with pin nails. Be careful not to nail into the glass, as you do not want to break the glass. Fill the nail holes with Bondo or wood filler, lightly sand being careful not to let the sandpaper touch the glass. Touch up the patched areas with paint. On each side of the door, use clear glass caulking around the inner edges where the glass meets the wood to ensure moisture does not get under the wood.
Step 12: Install your Doors!
Just as the building process can be done in a variety of different methods, installing the doors can vary depending on your particular door opening, trim, and hardware. There is so much that goes into installing a set of doors, that we could fill an entire separate blog post! The best advice we can give right now for installing doors is to take note of how the previous doors were installed and try to match. There is a lot of trial and error to it – do not be afraid to make a mistake – mistakes happen and anything can be fixed.

Conclusion:
By following these step-by-step instructions, you can build your own French doors and add a touch of sophistication to your space. Feel free to change up how you build your own doors to find what works best for you and your workshop. Remember to take accurate measurements, work with care and precision, and ensure your safety at all times. Once complete, your beautiful handcrafted French doors will enhance the aesthetic appeal of any home.
Hi there, I log on to your new stuff like every week.
Your story-telling style is awesome, keep doing what you’re doing!
When someone writes an post he/she keeps the plan of a user in his/her
brain that how a user can understand it. Thus that’s why this post
is amazing. Thanks!
I am no longer positive the place you are getting your info, however great topic.
I needs to spend a while learning much more or working out more.
Thanks for great information I was in search of this information for
my mission.